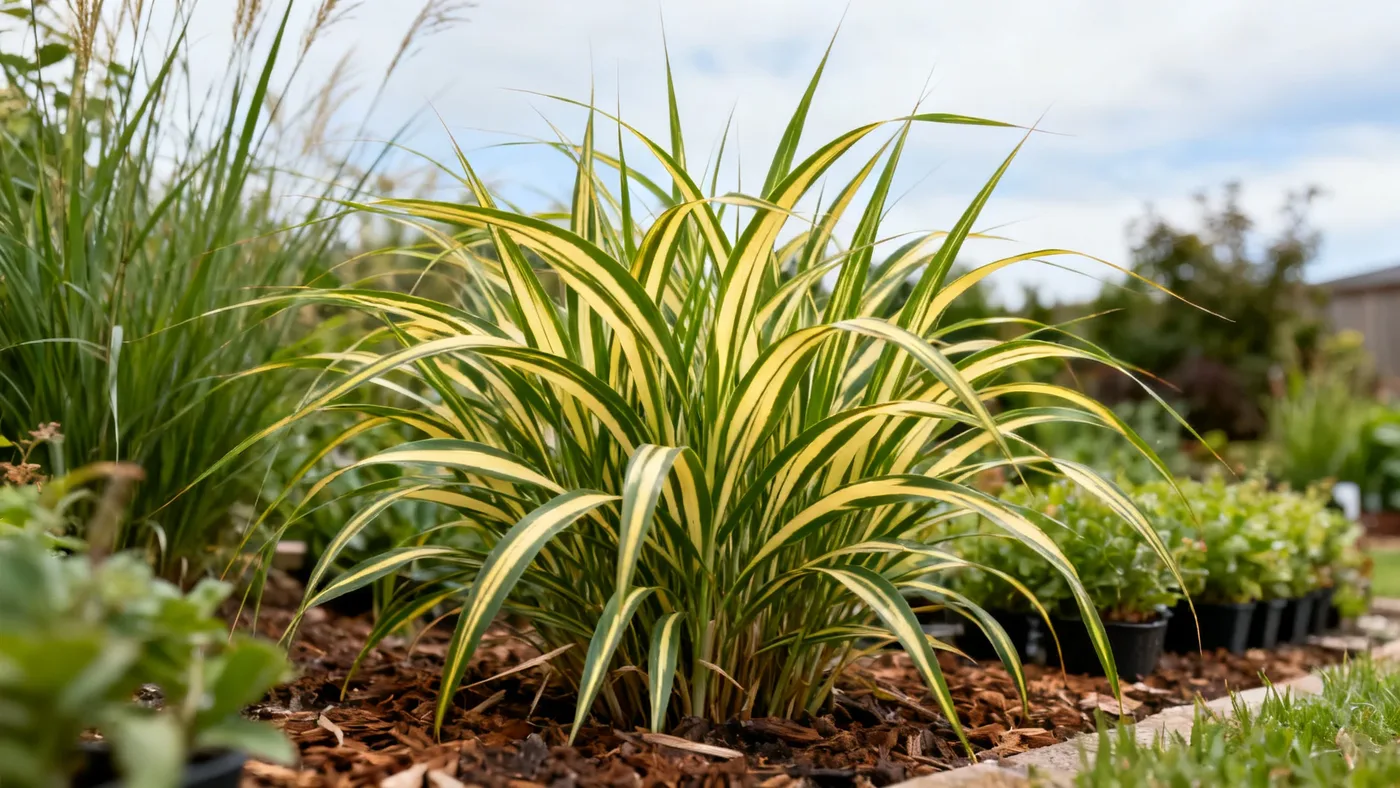
How to Propagate Dwarf Zebra Grass by Division
Division is the most reliable way to propagate Dwarf Zebra Grass and preserve the exact variegation of the parent plant. Unlike seed propagation, which often fails to keep the distinctive horizontal gold and cream banding true-to-type, division ensures your new plants will be identical to the mother clump. You get free plants, rejuvenate aging clumps, and expand your plantings, all from a single established specimen.
Why Divide Your Dwarf Zebra Grass?
Dwarf Zebra Grass benefits from division every 3 to 5 years to maintain vigor and prevent the center of the clump from dying out. A healthy established plant reaches 3 to 4 feet tall and 2 to 3 feet wide, making it an ideal candidate for splitting into multiple divisions as early as its second or third year in the garden.
Beyond rejuvenation, division gives you free plants to fill new areas, share with neighbors, or create a mass planting. Each division can establish itself in a single growing season and may bloom in its first or second year, rewarding your work quickly.
Best Timing: Early Spring
Divide Dwarf Zebra Grass in early spring, right before new growth emerges. In USDA zones 4 to 9, this window typically opens in March or early April, though your exact date depends on your local frost date and how quickly soil warms.
Spring is ideal because new growth is just beginning, so divisions recover quickly and establish roots before summer heat arrives. The foliage you pruned back in late winter to 4 to 6 inches has not yet regrown, making it much easier to see the crown and handle divisions without disturbing emerging shoots.
Early fall planting works in milder zones (8 and 9), but spring remains the safest choice because divisions have months to root before winter dormancy arrives.
Materials and Tools You'll Need
- Sharp spade or garden fork
- Sharp knife or pruning saw (for cutting through tough rhizomes)
- Work gloves, ideally thick leather (Dwarf Zebra Grass blades are sharp)
- Bucket of water for the digging site
- Prepared planting holes or containers with moist, well-drained soil
- Optional: a hammer or mallet to tap the spade through dense clumps
Step-by-Step Division Instructions
Step 1: Prepare Your Established Clump
Begin with a plant that is at least 2 to 3 years old and well established. The clump should be full and vigorous, with multiple shoots emerging from the center. If you have not already cut back your Dwarf Zebra Grass for the season, do so now. Cut all foliage back to 4 to 6 inches above the ground. This exposes the crown (where new shoots emerge) and makes it far easier to see where divisions should go. You can work with unpruned plants, but the tall foliage makes handling awkward and increases stress.
Step 2: Dig Out the Entire Clump
Water the planting area the day before if the soil is dry. This loosens the soil and reduces shock to the plant. Use a sharp spade to cut around the perimeter of the clump, working about 6 to 12 inches away from the visible shoots. Miscanthus roots are fibrous and fairly dense, so you may need to make several passes around the clump to fully encircle it.
Once you have loosened the edges, slide the spade under the base and lift the entire clump from the soil. Shake gently to remove excess soil so you can see the structure of the roots and shoots. You may need to rinse the clump with a hose to expose the base fully. Do not wash away all the soil, just enough to see where you are cutting.
Step 3: Identify and Plan Your Divisions
Look at the top of the clump where new shoots are emerging. You will see a central crown with multiple shoot clusters radiating outward. Each cluster should have at least 3 to 5 shoots and some attached roots. Plan to divide the clump into 3 to 4 sections for a vigorous plant, or up to 6 smaller divisions if you want maximum stock and accept slower establishment.
Smaller divisions (2 to 3 shoots each) will take longer to reach full size but will establish faster. For the quickest path to blooms, aim for divisions with 4 to 5 shoots each.
Step 4: Cut the Clump Into Divisions
Position the clump on the ground so you can work on it easily. Using a sharp knife or pruning saw, cut straight down between clusters of shoots, dividing the crown into sections. Be decisive: hesitant cuts can crush the rhizome instead of cutting cleanly through it. You may need a hammer or mallet to tap the knife through very tough, woody centers.
Each division should have a portion of the crown with at least 3 to 5 shoots and roots attached. It is normal for the cut surfaces to expose orange, brown, or tan-colored tissue inside the rhizome. This is not disease; it is the living core. Handle divisions gently to avoid further damage, and plant them immediately.
Step 5: Plant Your Divisions
Plant each division right away. Delay between digging and planting stresses the plant, so work efficiently. Space divisions 24 to 36 inches apart. In a mixed border, this allows room for the clump to reach its full mature width of 2 to 3 feet without crowding neighbors.
Plant divisions at the same depth they were in the original clump; the crown should sit right at soil level, not buried. Firm soil around each division and water thoroughly to eliminate air pockets and settle the soil. A newly planted division needs consistent moisture for the first 4 to 6 weeks while new roots establish. Water when the top inch of soil becomes dry.
Step 6: Aftercare Through the First Growing Season
Keep newly planted divisions consistently moist but not waterlogged for the first month. Once new shoots emerge and grow visibly (usually 2 to 3 weeks), you can ease back on watering. Dwarf Zebra Grass is drought tolerant once established, but young divisions benefit from regular moisture.
Avoid fertilizing in the year of planting. Wait until the following spring. Dwarf Zebra Grass is a light feeder, so one modest application of balanced fertilizer in spring is sufficient. Over-fertilizing causes floppy, weak growth that lodges in wind or heavy rain.
Divisions will reach full mature clump size in about 2 to 3 growing seasons. Many will bloom in the first or second year, displaying coppery-pink to reddish plumes that mature to silvery-tan or white in fall.
Tips for Success
- Sharp tools matter. A dull spade or knife is more likely to crush the rhizome than cut cleanly through it. Sharpen before you start.
- Divide on a cool, cloudy day if possible. This reduces stress on freshly divided plants. Avoid dividing in full sun or during heat waves.
- Do not let divisions dry out during the process. If you cannot plant them immediately, keep the clump misted and in shade. Delay longer than a few hours reduces success rates significantly.
- Mulch lightly. A 1 to 2 inch layer of compost around newly planted divisions helps retain moisture, but keep mulch 2 inches away from the crown to prevent rot.
- Watch for floppy growth in year two or three. If new shoots grow tall and thin, you are over-watering or over-fertilizing. Reduce both.
- Container divisions are possible. Plant divisions in large containers (18 inches or wider) filled with well-drained potting soil. This lets you position them in full sun and move them if needed, then plant them out once established.
Common Mistakes to Avoid
- Dividing too small: Divisions with only 1 to 2 shoots take much longer to establish and may not bloom in the first year. Aim for 3 to 5 shoots per division.
- Planting too deep: Burying the crown below soil level leads to rot and failure to establish. Plant level with the surrounding soil.
- Forgetting to prune before dividing: Unpruned clumps are heavy and awkward to handle. Cutting back to 4 to 6 inches makes the work easier, safer, and less stressful for the plant.
- Dividing old, woody clumps: If the center of your clump is dead or sparse, it is too old to divide profitably. Start with a vigorous plant in its prime.
- Planting too close together: Spacing divisions less than 24 inches apart leads to crowding and reduced air flow, which can invite rust or leaf spot fungal issues in humid climates.
- Overwatering established divisions: Once new growth is visible and the plant has rooted in (after 4 to 6 weeks), dial back watering. Miscanthus prefers average to dry conditions once established.
Expected Results and Timeline
Most divisions establish themselves within 2 to 3 weeks of planting, showing visible new growth as shoots emerge and expand. By the end of the first growing season, a well-cared-for division can reach 18 to 24 inches tall and develop a fairly full clump.
In the second and third growing seasons, divisions approach and then reach the full mature height of 3 to 4 feet in foliage (4 to 5 feet including flower plumes) and the full width of 2 to 3 feet. Many divisions bloom by the end of their first year, displaying the distinctive coppery-pink plumes that mature to silvery-tan or white.
For more details on ongoing care through the year, see our complete care guide for every season.
Quick Reference: Division Checklist
| Task | Timing | Details |
|---|---|---|
| Select plant to divide | Year 2-3 of growth | Must be established, vigorous, and full clump |
| Cut back foliage | Late winter / early spring | To 4 to 6 inches above ground |
| Dig entire clump | Early spring (March-April, zones 4-9) | Water soil day before if dry |
| Plan divisions | Same day as digging | Each division needs 3-5 shoots minimum |
| Cut and plant divisions | Same day as digging | Space 24 to 36 inches apart |
| Water and mulch | Immediately after planting | Keep moist 4-6 weeks; mulch 1-2 inches, 2 in from crown |
| New growth visible | 2-3 weeks after planting | Reduce watering frequency once rooted |
| First blooms possible | Late summer, year 1 or 2 | Coppery-pink plumes mature to silvery-tan |
| Full mature size reached | Year 2-3 after division | 3-4 ft tall, 2-3 ft wide; consider dividing every 3-5 years |